AI Integrations
Connect your AI tools to Torque.
Torque exposes a Model Context Protocol (MCP) server so that AI agents and assistants can interact with your blueprints and environments in natural language. Instead of switching to the Torque UI, your team can list spaces, launch blueprints, inspect running environments, and troubleshoot environments directly from the AI tools they already use — Claude, OpenAI Codex, GitHub Copilot in VS Code, or any other MCP-compatible client.
This section walks you through generating an API token and connecting each supported tool. The whole flow is designed to take a couple of minutes per tool.
Why connect an AI agent?
Bringing Torque into your AI agent turns infrastructure operations into a conversation. The main benefits:
- Self-service, in the tools you already use. Developers ask for environments and launch blueprints from their editor, terminal, or desktop assistant — no context switching to a separate console.
- Natural-language operations. "List my Torque spaces", "launch the
aws-eks-sandboxblueprint in thedevspace", or "show me why my last environment failed" all work without learning the REST API or CLI flags. - Guardrails stay in place. The agent acts through your Torque API token, so every action is bound to your existing roles, permissions, and policies. Agents can only do what you can do.
- Consistent, reproducible actions. The MCP server exposes the same operations the UI and API use, so agent-driven actions behave identically to manual ones.
- Works across the ecosystem. One MCP server, many clients. Anything that speaks MCP — Claude, Codex, Copilot, Cursor, Windsurf — can connect the same way.
How it works
Every integration authenticates with a Torque API key. You generate the key once on the API Keys page, paste it into the AI Integrations side pane, and the pane fills it into the setup steps and downloads for whichever tool you're connecting. Under the hood, all clients talk to the same hosted MCP endpoint over HTTP, sending the key as a bearer credential.
AI tool ──(MCP over HTTP, Bearer <API key>)──▶ Torque MCP Server ──▶ Spaces · Blueprints · Deployments
Get your API key into the pane
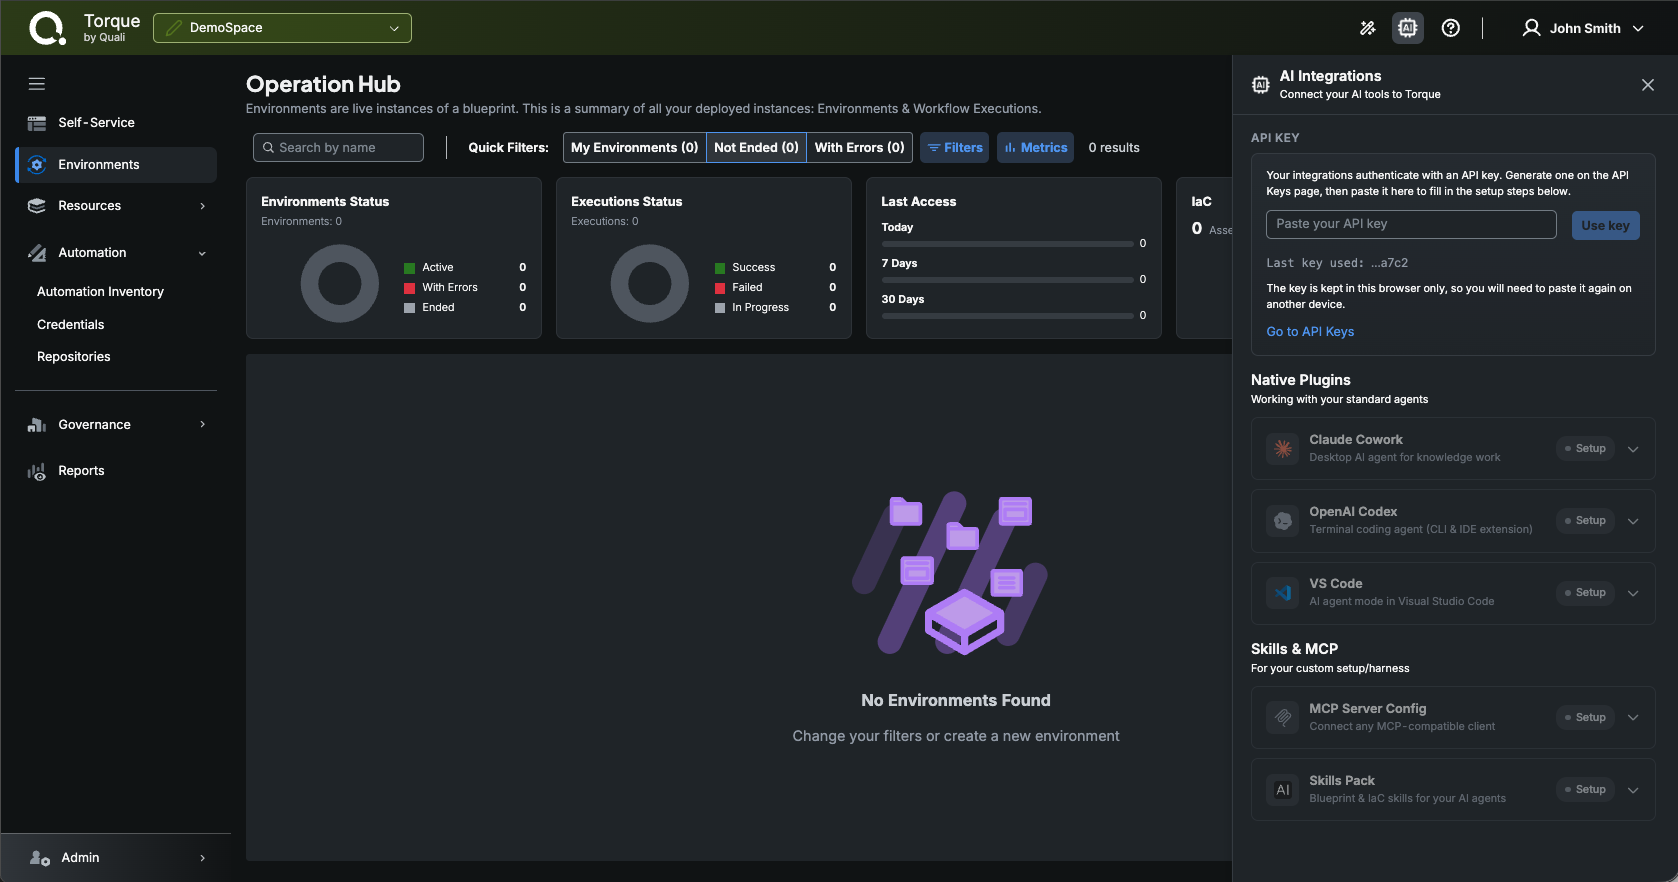
- Open Torque and click AI Integrations on the top bar (the side pane shown above will open).
- If you do not have a key yet, click Go to API Keys and generate one. See API Tokens for the steps.
- Paste the key into Paste your API key and click Use key. The pane shows Using key with the last characters of the key, and the integration panels become available.
The key is kept in this browser only. On another device, or after you click Clear, paste it again.
Treat the key like a password. It grants the same access you have in Torque. Do not commit it to source control or share it in plain text. If a key is exposed, revoke it on the API Keys page and generate a new one.
In the examples throughout this section, the key is written as
<YOUR_TORQUE_TOKEN>. Replace it with the value you copied.
Choose your integration
| Integration | Best for | Setup guide |
|---|---|---|
| Claude Cowork | Desktop AI agent for knowledge work | Connect Claude Cowork |
| OpenAI Codex | Terminal coding agent (CLI & IDE extension) | Connect OpenAI Codex |
| VS Code + Copilot | AI agent mode in Visual Studio Code | Connect VS Code + Copilot |
| MCP Server Config | Any MCP-compatible client (Claude Code, Cursor, Windsurf…) | Connect via MCP config |
| Skills Pack | Blueprint & IaC skills for your AI agents | Install the Skills Pack |
Each guide includes the exact steps, the commands or config to copy, and a first prompt to verify the connection works. When you finish a tool's setup, tick "I've completed the setup — mark as connected" in its panel to track status.
Verify a connection
Every integration exposes the same underlying operations, so the quickest way to confirm a tool is connected is to ask it a read-only question, for example:
- "List my Torque spaces."
- "List my Torque environments."
- "Show the blueprints available in the
devspace."
If the agent returns your real spaces or environments, the connection is working.
Next steps
- Pick a tool above and follow its guide.
- Once connected, try launching a blueprint or inspecting an environment by asking the agent in plain language.
- Add the Skills Pack to give your agent ready-made blueprint and Infrastructure-as-Code know-how.