Credentials
The Torque Credentials store is a built-in mechanism for securely persisting authentication details, enabling automation assets to retrieve and use them at runtime. Credentials function similarly to Parameters in terms of consumption, but they differ structurally: parameters are simple key-value pairs, whereas credentials are typed objects composed of multiple fields whose schema varies according to the credential type.
Credentials are used for:
- Cloud providers such as AWS and Azure - accessed by Terraform, CloudFormation, and other IaC grains through the grain's
authenticationsection. - Git providers (GitHub, GitLab, Bitbucket, Azure DevOps, CodeCommit, CloudShell) - used to connect repositories. The Add Repository wizard saves the credentials you provide there into the store automatically.
- Hypervisors (VMware vCenter), network management (Nexus Dashboard), and licensing subscriptions (NVAIE, RedHat) - used by the corresponding integrations.
The Credentials page
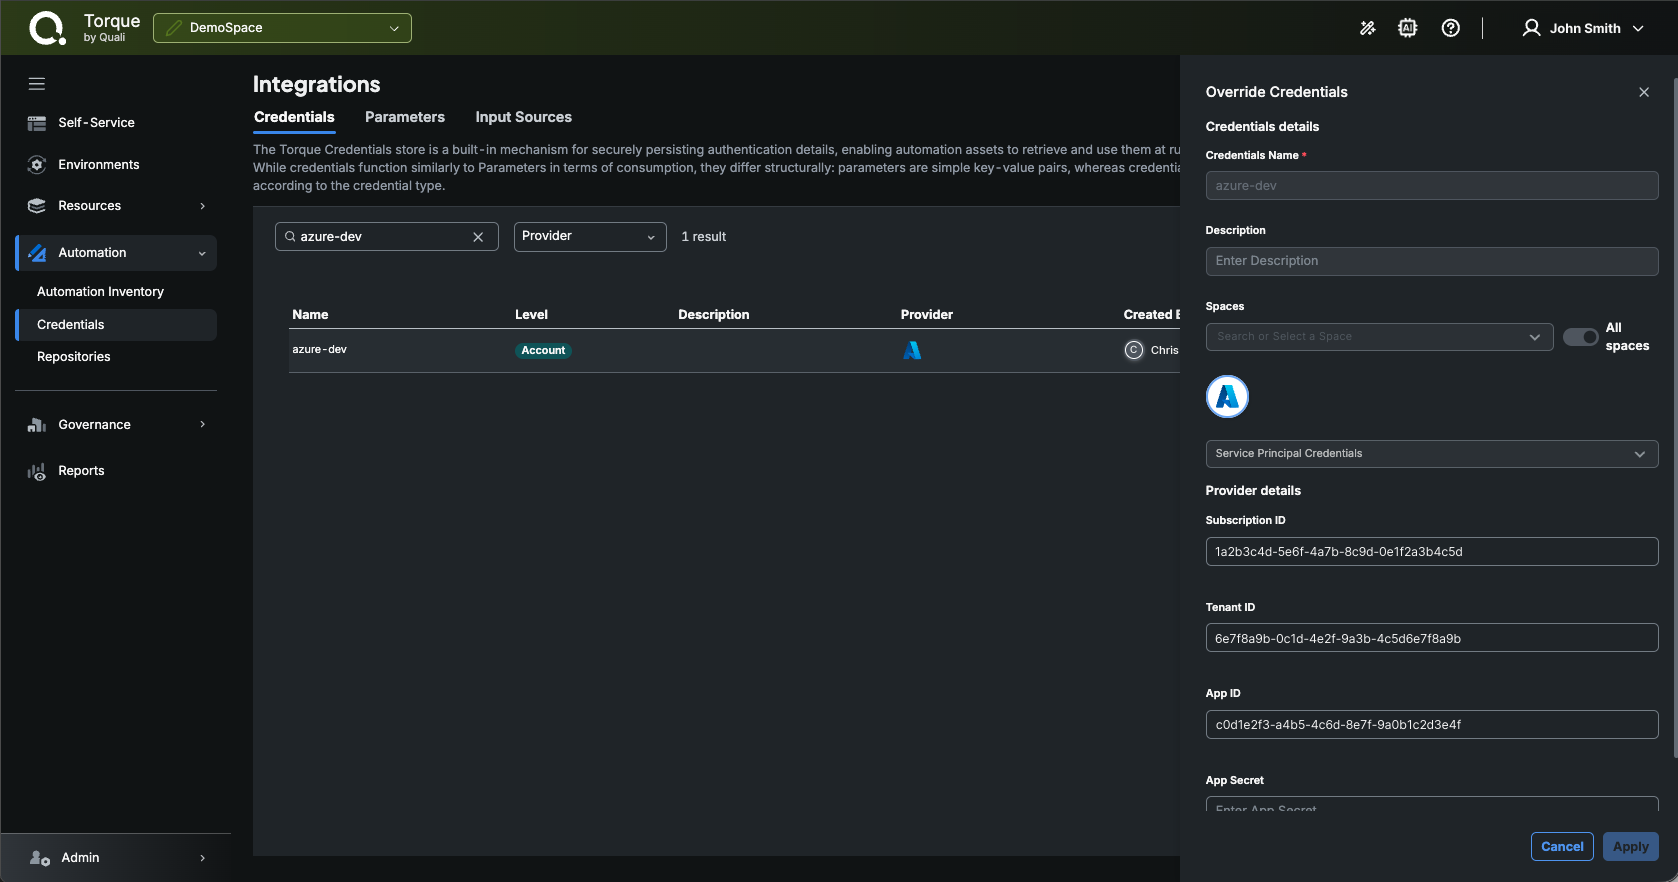
Go to Automation > Credentials. The Integrations page opens on its Credentials tab (the other tabs are Parameters and Input Sources). The table lists each credential's Name, Description, Provider, Spaces, Created By, and Last Modified. Use the search box and the Provider filter to find credentials, and click a credential to view or edit its details.
Add a credential
- In Automation > Credentials, click Add Credentials. The Add Credential wizard opens.
- In the Credential Type step, select the provider tile. Tiles are grouped into Cloud Providers, Git Providers, Hypervisors, Network Management, and Licensing & Subscriptions; use the Credential Type filter to show or hide groups. Click Next.
- In the Authentication step, enter the Provider details for the selected type (see the table below) and click Next.
- In the Summary step, enter a Credentials Name, optionally a Description, and select the Spaces that may use the credential (or keep All spaces).
- Click Apply.
| Credential type | Provider details |
|---|---|
| AWS | Choose the access type: Basic (Account Number, Access Key, Secret Key) or Role ARN (Role Arn and External ID). For the role option, see Get Role ARN and external ID below. |
| Azure | Tenant ID, Subscription ID, App ID, App Secret of a service principal. |
| GitHub, Bitbucket, Azure DevOps | Personal Access Token with read access to the repositories. |
| GitLab | Access Token Type and Personal Access Token. |
| CodeCommit | Role ARN, AWS Region, External ID, and the User Name and Password of the IAM user's HTTPS Git credentials. |
| CloudShell | Server Address, Token TTL (optional), User Name, Password. |
| Nexus Dashboard | URL (with an optional Validate Certificate checkbox), Username, API Key. |
| VMware vCenter, NVAIE, RedHat | The connection details requested by the wizard for that integration. |
Field names in the table are taken from the Add Credential wizard. The exact set of fields may differ slightly between account types; follow the wizard.
Edit or remove a credential
Click a credential in the table to open the Edit Credentials drawer. You can change the Description, the Spaces the credential is shared with, and the Provider details, then click Apply. The Credentials Name cannot be changed.
Modifying or deleting a credential may cause the repositories, blueprints, and integrations that use it to fail.
Use a credential in a blueprint
Once created, you can reference the credential in the grain's authentication section.
Get Role ARN and external ID
-
In your AWS Management Console, open the IAM console at https://console.aws.amazon.com/iam/.
-
In the navigation pane of the IAM console, create a permissions policy to be associated with the role.
- Select Policies, and then click Create Policy. For information and assistance on generating an AWS IAM Policy, you can use the official AWS Policy Generator.
- Assign the permissions as appropriate.
- Choose a name for your policy and save it.
-
In the navigation pane of the IAM console, select Roles, and then click Create Role.
- From Select trusted entity, choose AWS Account.
- Under An AWS account ID, select An AWS account and enter 349148204654. (This is the Torque AWS account that will assume the role).
- Select Require external ID.
- Enter an External ID of your choosing. The External Id will be used to validate the Consumer of the ARN Role. Keep note of the external ID as you will need it later in the configuration step.
- In Next:Permissions, select the policy you have just created in step 2.
- Click Next.
- Enter a Role Name or role name suffix to help you identify the purpose of this role or use AWS defined Name.
- Click Create Role.
- (Optional) Enter a Description for the new role.
- Review the role and then click Create role. Keep note of the role ARN as you will need it later in the configuration step.